Showing posts with label inexpensive project. Show all posts

Sunday, April 14, 2013

DIY Spring Wreath

Although it doesn't feel like Spring here in good old Buffalo, New York, I was cruising Pinterest and got inspired by this Spring wreath!

Originally found at the Piccadilly Peddler


Since my front door has been empty since my Easter decorations came down, I got to work on making one.  Here's the supplies I bought: a wreath, felt in various colors, yarn, a wood letter with our initial and some straight pins.  From my supply cabinet I used my glue gun, some gems and burlap I had left over from another project.

DIY Spring Wreath

I followed the directions of the original Pinner and also went online to find some other felt flower tutorials so I could get a variety of flowers made.  Here's the start of my flower pile.  

DIY Spring Wreath - Felt Flowers

I wrapped the wreath in the burlap and attached it with pins.  

DIY Spring Wreath

From there I made the rest of the flowers and attached them with pins.  I used the yarn to attach our initial and hot glue to add the gems to the flowers.  I sacrificed a reusable shopping bag and cut off the handle to use as a hanger.  Here's my finished product:

Finished product - Spring Wreath with Felt Flowers

Felt Flowers

I'm really happy with the way it came out.  It was pretty easy to do even though I had never made the felt flowers before.  I spent around $20 for all the supplies.  Given how easy this was and the cost, this gets a PIN!  


Pin It

Saturday, April 6, 2013

DIY Wall Art - You Are My Sunshine

It's been a while but I am back!  The Easter holiday had me busy, busy!  With Spring on the way, hopefully, I thought it would be a good time to share a project I did with my son last year at this time.  Since he was a baby, I have sang "You Are My Sunshine" to him.  My Grandma sang it to me and I've always loved the song, so when I came across this DIY wall art idea, I had to do it.  

You Are My Sunshine Hand Print Picture
Originally found at The Polka Dot Pavilion's Facebook Page


This was another project that was done before Pin or Pass so I don't have any before photos, but I went to the craft store and got a blank canvas and paint in royal blue, red and yellow.  I had coupons and everything was on sale so I probably spent around $10.  

I wanted this to be a project my son and I did together so I let him take his hands, dip them in the royal blue paint and smear it all over the canvas to create the background.  I let it dry for several hours, then I dipped my hands in yellow pant and made hand prints in a circle.  Then he dipped his hands in the yellow and I helped him fill in the areas I missed with his hand prints.  From there, I took a medium sized paint brush and wrote You Are My Sunshine on the picture.

Here's our end result:

You Are My Sunshine Hand Print Picture

It's cute but I am a bit of a perfectionist.  I like DIY projects that don't LOOK like DIY projects.  I should have used a lighter color for the background and I would have gotten a little more meticulous in terms of the background application, maybe adding in a little white as well.  I also would have done the letters differently, I'm not sure how but I feel like mine look a little sloppy.  

Like I said, overall I think the picture is ok and he had fun making it so that is worth it alone but if I had to do it over again, I would do a lot differently and I'm still not sure it would have come out to the point where I'd be really happy with it.  This pin gets a PASS from me but only because I'm nutty and like things to look a certain way!  

What do you think about this one?  PIN or PASS?

Pin It

Sunday, March 10, 2013

Home Organization - Pinterest Style - Part 1

I love bins, totes and baskets. When I see them in a store, I just can't help myself.  Some (my husband), may say I am "bin crazy" but I don't care, they provide great home organization.  Pinterest always has some great home organization ideas but I really focused on closets and cupboards with this project.  So with the beautiful weather we have today, Spring cleaning may be on your mind so I thought I'd share how my home organization project turned out!

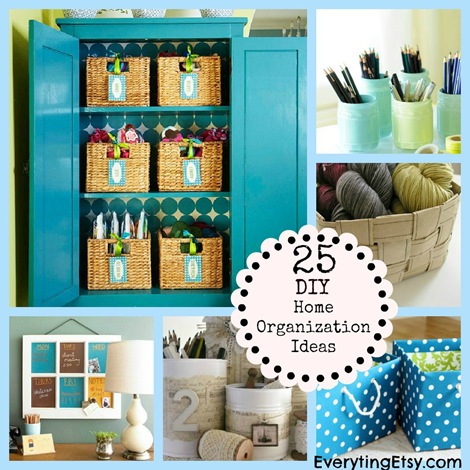
Home Organization Using BasketsMy inspiration came from many different places, so I'll just give you my top few.  First of all, I came across several different blogs where the authors used dollar store items to do home organization.  While I love the look of baskets, like in this picture from Everything Etsy, they can get expensive.  Since no one really sees the areas I am organizing, I didn't want to spend a ton on nice baskets so I knew doing something like this, which I found on the crazycraftlady.com, with plastic baskets and bins from Dollar Tree would be more in line with my budget.  I also went to Ikea and got some inexpensive bins for my linen closet which needed storage for larger items.

tHome Organization Using Dollar Store ItemsThere were two areas that needed attention ASAP...my upstairs linen closet and one of my kitchen cabinets.  The kitchen cabinet was by far the worst.  I used it to hold all my spices, some baking stuff, seasonings, etc.  Everytime you'd open the cabinet something would fall out on you. And forget about finding anything.  If it wasn't right in front, I'd have to get my stool and pull everything out just to find the one thing I needed.  It made me INSANE!

So I went to work and here's my end result:


Linen closet home organization project
Linen Closet  - Home Organization Using Ikea Bins

Kitchen cabinet home organization project using dollar store bins
Kitchen Cabinet - Home Organization Using Dollar Tree Bins

I know mine don't look as "pretty" as the ones in the original pins but they function the way I need them to and that's what was important to me.  Overall these two projects get a PIN, they were relatively inexpensive, easy to do and functioned the way I needed them to by providing some nice home organization.

Up next...part 2 of home organization, our communication center!

Pin It

Sunday, January 13, 2013

Easy DIY Wall Art - Recycled Wood and Some Fabric

Several posts ago I shared a pin that I gave a big PASS to, called DIY wall art with your welcome mat.  If you missed that post, check it out but here's a quick reminder of the end result...yikes!

DIY wall art gone bad!
As I mentioned in the original post, I spent more than I would have liked to on the supplies for this project so when it came out terrible I started looking through my pins to see how I could recycle the supplies.  I found several pins that I got inspiration from so I incorporated pieces of each to come up with my latest project.

Home Design Pins
The New England Southerner

The original pins came from two sites, Home Design Pins and The New England Southerner.  Here are the pictures of my inspiration. I think both of these pins look great so I went out and got some fabric to cover the wood from my DIY wall art project that bombed!

For $8 from Joann Fabrics, I got enough fabric to cover both pieces of wood.  I ironed the fabric, placed the wood on it and stapled it into place.  If you've never covered anything before, it is fairly easy you just need to make sure that you don't have any bumps in the fabric and then wrap what ever you are covering similar to a present!  That may not be the "right" way to do it, but that's how I do and it works just fine, LOL!


Here's how it came out.  At first I debated about whether or not to add photos so I hung up the covered pieces without photos and lived with it for a few days.  You can see what I decided and I have to say, I love it!

DIY Wallart DIY Wallart


DIY Wallart

So for $8 I revived my dead project, recycled some materials and created something I really like.  It was quick and easy and gave me a great place to highlight my kids' pictures.  I think putting the photos on the fabric really helps them pop and stand out as a focal point of the room.  Both of these original pins get a big PIN from me!

Now, last but not least...should I put lights over them like Home Design Pins did?  Tell me what you think!

Up next...a jumbo ruler growth chart!

Pin It

Tuesday, January 8, 2013

A Home For Your Child's Artwork

Look What I Made Board
Original Idea From: Windmill Lettering
As a Mom, I love when my 3 year old comes home from Pre-K with his latest work of art! He's usually so proud of what he's done and can't wait to share it with me. For a while, the side of our fridge was his art gallery but as more and more projects came rolling in, we were quickly running out of room, until I found this!

I loved this idea so I went to JoAnn Fabrics and bought a piece of thin wood that was about $5.  Then I went to Walmart and bought a pack of wood letters. They were $10 but it came with 100 letters.  The letters on the board from Windmill Lettering are vinyl.  They look really nice but I was able to recreate a similar look for the same price AND have wood letters left over to use on future projects.

I gave my board a light sanding and spray painted it with black spray paint.  Then I spray painted the letters cream.  With a hot glue gun, I glued on each of the letters and the clothes pins and wa-la!

I decided not to put my son's name on it because I have two kids and wanted to be able to use it for both of them.  You could do the same or just make a board for each child.  I also made my board a little larger than the original pinner's.

Look What I Made display for children's art projects
My Finished Product
I spent $2 less than what it would cost to order this from the original site and I think it looks just as good, plus I have wood letters to use on upcoming projects.  So for a total of $15 I have a home for all our artwork and this project gets a definite PIN from me.       

Up next...my new wall art made from the wood of my DIY Wall Art project that bombed!


Pin It

Wednesday, January 2, 2013

A Quick Fix For Your Moving Throw Rug

I have been loosing an ongoing battle with the rug in my downstairs bathroom for quite some time.  Sitting on the laminate floor, it slides every where!  I tried the mat that went underneath but it would still shift and then you could see the mat, so the mat went in the garbage.  Then I tried the things you stick to the back and those helped but they came off after a few washes.

So, for the past few months it's been sitting, a fall waiting to happen as my 3 year old runs at warp speed to get to the potty, with nothing to stop it from sliding.  Most days it ends up bunched against the wall.  It looks messy and like I said, it's an accident waiting to happen.  

Sliding area rug


So when I found this pin project I was excited to give it a try and I'm happy to report, I think I'll be saying good-bye to moving throw rugs from now on with this simple fix!  Originally found at This Crazy Life, the author took caulk and applied it to the back of the rug.  She suggested putting the stripes every 6 inches but I did mine much closer together.  My rug was smaller than the one she was working on and I really wanted to make sure it wasn't going anywhere!  After applying all the stripes, I let it dry overnight just to be safe.  

Using caulk to stop an area rug from slidingCaulk on the back of an area rug to prevent it from sliding

The next day I put it out and the end result...a rug that stays where I put it! Victory!  This project took about 5 minutes to complete and was free for me because we had caulk and a caulk gun.  If you had to buy the supplies, it would still be relatively in-expensive.  One thing to note, the smell of the caulk was a little unpleasant for a few days.  If you try this and it smells, not to worry, after about 3 days the smell went away and now there is no odor.  This pin gets a huge PIN from me! 

Up next...Look What I Made, a pin project to display all your child's artwork.   

Pin It