Here was my inspiration:
 |
| Original from It's doable...Crafts, food and life. |
 |
| Originally from Literally Inspired |
I followed the instructions the original Pinner provided and I started by painting my canvas with a silver background color. While it dried, I cut all the leaves out. Once the leaves were cut I laid them out in the pattern to get an idea of where to place them. From there, I used craft glue to glue the leaves on. This is where I went wrong. The glue was a little too heavy and some of the leaves didn't lay as flat as they should have. Once all the leaves were on and dry, I went over it with a coat of Matte finish Modge Podge. This made the bumps in the leaves from the glue stick out even more! You can't see it when it's hanging on the wall, but if you look closely you can see them.
Here's my end result:
If you look closely, you can see what I am talking about with some of the leaves being bumpy. I also wasn't really happy with the way the flower itself came together. The original Pinner got her leaves in a much tighter pattern and I think it looked nicer. While this project was easy and inexpensive, I don't LOVE my end result, so if I had to do it over again, I wouldn't! I give this pin a PASS.
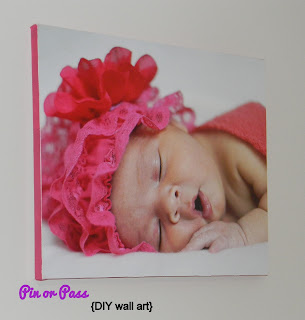
My second DIY wall art project was much more successful. For this one, I took another canvas and photo of Julianna. I got a poster size print from Walmart for $5! I got it about an inch or two larger than the canvas all the way around the perimeter of the picture. I painted the edges of the canvas hot pink (of course!) and used some craft glue to glue the picture down. The graft glue worked fine for this project because photo paper is a lot heavier than scrapbook paper. I glued the photo to the canvas and used an exacto knife to trim the excess off around the edges. I used a sanding block to smooth the edges. I know I thought it sounded crazy too but that's what the original Pinner said to do to clean up the edges so I tried it and it worked! From there, I used Modge Podge on top to give it a textured look. The original Pinner recommended another product to go over top, but Modge Podge worked fine for me. Here my end result:
I was happy with the way this one came out! Of course it doesn't hurt that she's a doll :-) For less than $10 this project was complete. It was easy and came out as expected, this one gets a PIN!
Up next...in the final part of my baby girl nursery series, I'll review her dresser re-do and her tutu table! Stay tuned.
Tell me, what do you think so far?


No comments:
Post a Comment