Showing posts with label Pinterest inspired. Show all posts

Wednesday, January 1, 2014

2013 - Year In Review

2013 was filled with Pinterest projects for me!  I tried everything from recipes to making home decor. Some came out great, some not so much!  Here's a look back at some of my favorites!

Turning my Biggest "PASS" into One of My Favorite Projects

One of my very first projects was a DIY Wall Art using wood, spray paint and a rubber welcome mat.  It was an epic fail.  You can read about it here.  Well after spending so much on it, I didn't want the materials to go to waste so I did some recycling and created one of my favorite projects from my greatest fail.  This was the end result.  You can read the entire post here.  

DIY Wall Art
Read the post:  Easy DIY Wall Art - Recycled Wood and Some Fabric

My Biggest Pin Project of the Year 

My biggest pin project of the year was my fireplace makeover inspired by Pinterest.  You'll see in the full post that I did not really do much of anything on this project LOL, other than pick out the materials and surf Pinterest.  It was really the hard work of my husband and Dad that made this one come together, but none the less, it came it awesome!

Fireplace Makeover
Read the post:  A Fireplace Makeover Inspired by Pinterest
The Pin that Has Benefited My House the Most

As you know there are a ton of things on Pinterest to help you clean and organize your home.  Well not all of them come out the way the original pinner says but one that blew me away was How to Clean a Microfiber Couch.  I have two small kids and my couch is always horrifying so this pin has really helped us keep our couch clean and we've used it regularly.

How to clean a microfiber couch
Read the post: How to Clean a Microfiber Couch

My Favorite Pinterest Inspired Event

My little sister got married this year and as her Maid of Honor I had to pull out all the stops on her shower.  We of course had a budget so I turned to Pinterest for inspiration.  My favorite part was the favors.  I used pashmina scarves as chair cover sashes and gave them to guests as their thank you.  It looked great and everyone really liked that they were different than the usual box of chocolates.  There were a ton of Pinterest inspired things at the shower so read the full post for more!    

bridal shower favors
Read the post: Unique Bridal Shower Favors and More Inspired by Pinterest
If you are not already, follow me on Facebook.  Throughout the month of January I'll be going back through the archives and pulling out some of my other favorite pin projects to share for inspiration.  In 2014, I have a lot I want to get accomplished so stay tuned for more exciting stuff and as always, I love guest posters so feel free to send me your PIN or PASS reviews!


Pin It

Monday, May 13, 2013

How to Make a $2 Cake Stand

Who doesn't need a cake stand, right?  To be honest, I really don't LOL.  I don't make cakes all that often and when I do they are usually not placed on a fancy cake stand but I kept seeing this pin and I had to try it.  I figured I would use it at one point or another and if I didn't I was only out a few bucks!

Here is my original inspiration:

Originally found on Design by TJEJEN
The blog I originally got this from  was written in Swedish.  When I just went back in to reference it for this post I realized that my browser (Chrome) had the ability to translate!  So can see where this is going right?  Since I didn't figure that out until now, I also didn't see that this pinner got her idea from a very popular American blogger I see all the time, the Centsational Girl.  On her blog she had step by step instructions, so if you decide to try this, go to her post! If I had to do it over I would follow her instructions.   

So with no instructions, just pictures, I went to the Dollar Tree and bought a clear martini glass and a clear plate.  I also got crazy glue to adhere the plate to the glass.  (The Centsational Girl's post used silicone.)  

I flipped the plate over and put glue around the plate where the glass fit.  I stuck it on and let it dry for a bit.  A little glue oozed out so I had to wipe that off.  You can see how this got a little sloppy in one of my photos below. 

DIY Cake Stand

DIY Cake Stand

DIY Cake Stand
Sloppy Glue

From there I took it to the garage and spray painted two coats of my purple spray paint, letting it dry in between each coat.
DIY Cake Stand

Here's my end result (I didn't have any cakes handy for my picture!):


DIY Cake Stand

For $2 it's not bad, but I can see where following Centsational Girl's instructions would have helped out. You can't tell from these photos but if you get up close, the paint is a little spotty even after two coats.  Priming it with the frost spray as she recommends would probably have helped that.  I totally would have used silicone too...I'm nervous my stand is going to buckle under pressure, literally, as soon as a cake gets on top of it!

This project gets a PIN with modifications...if I had found the right instructions right off the bat, this would have had a better outcome.

This is the frustrating part of Pinterest for me.  I HATE when I see something I love and want to try but can't find instructions or at least some sort of details that can point you in the right direction. So I want to know, as something like this ever happened to you?  Comment on the blog or on Facebook, I'd love to hear from you.


Pin It

Sunday, April 14, 2013

DIY Spring Wreath

Although it doesn't feel like Spring here in good old Buffalo, New York, I was cruising Pinterest and got inspired by this Spring wreath!

Originally found at the Piccadilly Peddler


Since my front door has been empty since my Easter decorations came down, I got to work on making one.  Here's the supplies I bought: a wreath, felt in various colors, yarn, a wood letter with our initial and some straight pins.  From my supply cabinet I used my glue gun, some gems and burlap I had left over from another project.

DIY Spring Wreath

I followed the directions of the original Pinner and also went online to find some other felt flower tutorials so I could get a variety of flowers made.  Here's the start of my flower pile.  

DIY Spring Wreath - Felt Flowers

I wrapped the wreath in the burlap and attached it with pins.  

DIY Spring Wreath

From there I made the rest of the flowers and attached them with pins.  I used the yarn to attach our initial and hot glue to add the gems to the flowers.  I sacrificed a reusable shopping bag and cut off the handle to use as a hanger.  Here's my finished product:

Finished product - Spring Wreath with Felt Flowers

Felt Flowers

I'm really happy with the way it came out.  It was pretty easy to do even though I had never made the felt flowers before.  I spent around $20 for all the supplies.  Given how easy this was and the cost, this gets a PIN!  


Pin It

Monday, March 25, 2013

A Baby Girl Nursery - Pinterest Style Part 3

Welcome to the last of my 3 part series, a baby girl nursery, Pinterest style!  In today's post I am going to cover the last two major projects I did for her room, a dresser makeover and a tutu table.  Let's start with my inspiration:
Originally found at Real Simple
DIY dresser makeover
Originally found at Good Bye House, Hello Home

Let's start with the dresser.  Now, I will tell you up front, much like our fireplace makeover I didn't have much to do with the manual labor on this project, I was the Visionary :) and Chris (my husband) did the hard stuff!  The dresser we got was handed down from his Mom.  It was a very high quality piece of furniture but it was a blonde stain.  Not going to work with our color scheme at all, so Chris started sanding!  He sanded it down quite a bit to get all the lacquer off.  From there, we primed it using regular paint primer.  Then he went over with 4 (or 5 I lost track) coats of white paint.  We spray painted the handles hot pink to match everything else in the room and after a lot of dry time, here is our end result!

DIY dresser makeover white with hot pink hardware

I am very happy with the way it came out.  Since the dresser was free, the only thing we had to buy was paint so it was inexpensive to do this dresser makeover.  To dress it up a bit more, I took the left over scrapbook paper I had from the DIY wall art project and made a mat to put underneath the glass on top.  Here's a the finished product. 

DIY dresser topper

I love the end result of this project.  I think it looks really cute and she'll be able to use it as she grows.  Plus if she ever wants to change the color scheme in her room the handles are easy enough to repaint.  If I had to do all the manual labor on this, it would probably be getting a PASS because he put a lot of time into doing all the coats, but since I didn't :-)  this project gets a PIN!

Onto the tutu table...I LOVE the tutu table.  Who am I kidding, I love all things tutu.  I'd put her in one everyday if I could!  When I saw the idea to make one out of a table I had to do it.  I got a $20 white table from Ikea and sprayed it...you guessed it, hot pink.  Then I got black tulle and lime green trim to accent the edges with.  My originally thought was I was going to hot glue the tulle along the inside lip of the table top.  Well when I sat down to put it together I quickly realized that wasn't going to work.  The tulle wouldn't stick to the table that well and it wouldn't bunch up nicely, so I had to enlist the help of none other than my Grandma D.  Now, a quick side note on Grandma D...she is the Craft Queen.  She can do it all, knit, crochet, paint, create, you name it, she can do it.  So when ever I have a project emergency, I go to her for help.  

Anyway, I took all my supplies to her and she used some elastic to string the tulle together.  Then she sewed the trim along the top of the tulle so it almost looked like a Hula skirt made from tulle.  From there, we hot glued the skirt to the edge of the table.  Here's the end result.


I don't love it.  In fact, I don't even really like it, but it's fine for now.  I needed way more tulle to make the skirt fuller.  I should have either went a little shorter or took the tulle all the way to the floor because I feel like this length looks awkward.  I like the lime green edging but it doesn't stay well on the table.  Since the table is metal, it is hard to get things to stick to it.  If I had to do over again, I would have found an old wood table, repainted it and stapled the tulle to the inside making the changes to length that I just mentioned.  Not including the cost of the table itself, I spent over $20 in supplies using coupons.  I think using a wood table and using more tulle would have made the outcome better but then it would have been even more expensive so while it breaks my heart to say it, the tutu table gets a PASS!

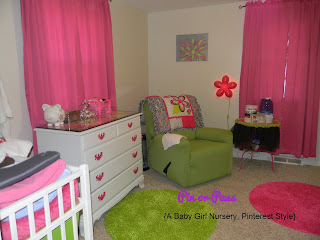
I had a lot of fun doing her nursery!  I think everything came out really well with the exception of a few projects I'd pass on, if I had to do it again.  Here's a a few overall photos, hope you enjoyed my baby girl nursery, Pinterest style series!

Pinterest inspired baby girl nursery

Pinterest inspired baby girl nursery

Pinterest inspired baby girl nursery

Pin It

Monday, March 18, 2013

A Baby Girl Nursery, Pinterest Style - Part 1

When I found out my second child was a girl, I was SO happy!  Don't get me wrong, I love having a little boy too.  Although I will admit, when I first found out he was going to be a boy I was a little nervous because I wasn't sure what do with a boy.  You can't paint their nails or get their ears pierced or buy them tutus!  But, it turns out boys are pretty cool too and I wouldn't trade him for the world!  I digress, regardless of how cool he turned out to be, boy stuff is not as fun as girl stuff.  There isn't as many options and everything looks the same so when I found out Julianna was on the way, I couldn't wait to get started on a baby girl nursery inspired by Pinterest!

I had just really gotten the Pinterest bug when I started planning.  Pin or Pass wasn't even a thought yet so unfortunately I don't have any before and after photos, just finished products.  Getting started I knew I wanted something different.  I didn't want the typical pale pink with butterflies kind of thing.  That theme for a baby girl nursery is very cute, just not me.  I'm more of a animal print/hot pink kind of person :-).

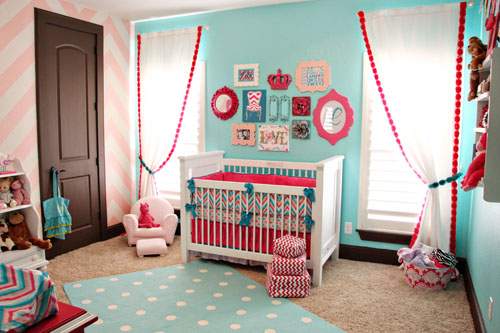
Over the course of a few posts, I will go over all the projects I did for her room.  Let's get started with the focal point of her room, the crib with a collage above it.  Here's my inspiration.

baby girl nursery
Originally found at Project Nursery

nursery wall decor
Originally found at Lilly Cakes

DIY nursery wall decor
Original site is no longer available
Originally found at Small Chic Home

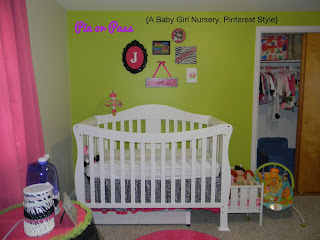
So after seeing all of these I selected a color scheme.  I chose hot pink, lime green and Zebra print.  I know, I know, I'm sure that seems a bit unusual for a baby's room, but once you see the comforter I found you'll understand and hopefully agree that it looks cute.  Plus I figured it would be something she could grow with for a few years.  Here's my end result:

lime green, hot pink and zebra baby girl nursery


My favorite part of the collage over her crib is the black frame with the "J' in it.  I got that on clearance at Hobby Lobby and I believe it was less than $10.  The sign hanging by the pink ribbon is also from Hobby Lobby and I bought scrapbook stickers that say "It's All About Me" on them, which are tough to see in this picture.  The picture with the words on it is from Walmart, $5!  The three items along the right side I made.  The top pink circle is just a piece of craft wood with her picture Modge Podged to it.  The middle piece is a canvas wrapped in zebra cloth.  The word Princess is made in wood and bought from the craft store for a few dollars.  I spray painted it hot pink to match.  Last but not least, our butterfly foot print.  I took her feet and dipped them in paint, then put them on the canvas.  

Everything in the collage is a PIN except for the wood with the picture and the butterfly print, those two items get a PASS!  The wood with the photo only gets a PASS because of the way it came together based on what I used.  I should have either cut the picture into a circle or bought a square piece of wood.  I think it just looks a bit awkward the way it is now.  

The butterfly picture while adorable was nearly impossible to do.  It took 3 tries before I got it to this and I'm still not totally satisfied with the end result.  The second I would put the paint on her feet she would squish them up because it was cold, so it made it impossible to get a good foot print.  As soon as I'd push them on the canvas she'd inevitably squish her toes again and ruin the print.  Cute idea for an older child, but not practical for a newborn, so PASS on this one.  

So that's the focal point of her room, the crib and the collage above it.  Stay tuned for my next post...DIY wall art for a baby girl nursery.
 

Pin It