Wednesday, January 30, 2013

Let's Chat - Pin or Pass on Pinterest

Tonight I'm not going to post a project...although I have many good things cooking up that I'll be sharing soon :).  Instead, tonight I want to chat about something and I really hope you'll join in and give me your thoughts both in the comments here and on my Facebook page.

In the last few days, I've read several articles about Moms who say that Pinterest makes them feel "inadequate."  Some of the posts got pretty serious.  The common denominator in all the articles and posts that I read were Moms saying that when they go on Pinterest and see all the crafty things other people are doing they feel bad about themselves when they can't or don't want to do the same.  

Now don't get me wrong, there are times when I am surfing Pinterest and I think "yeah right, who's got time to do that, I can barely get myself showered everyday!" There are certainly days when this e-card sums it up perfectly.   But a majority of the time, I see something I like, pin it and let it sit for weeks until I have time to tackle it or until I need to tackle it.  
Personally I find Pinterest very helpful.  I find ideas on there that lead to other ideas and turn into great things that solve a problem I am having or fill a need.  I pin a lot of stuff knowing that I may never do it but the idea is there if I ever have a need for it, or if I just feel like giving it a try.  A perfect example of this is growth chart ruler.  I saw it, pinned it and it sat on my board for weeks.  One day I decided I was going to give it try.  I surveyed my house thinking about where to put it and decided on a wall in my kitchen I just hadn't found the right thing for. Pin accomplished and wall decorated, sounds like a win-win to me!

Well, these Moms don't feel that way.  It seemed to me that they felt pressured to do as many of their pins as possible.  They also sounded like they were trying to keep up with what others were doing and if they couldn't or didn't want to, they deemed themselves as failures.  One mentioned that she felt bad when her cupcakes didn't look as nice as the ones she seen on Pinterest.  

So I'm sitting there reading these articles and thinking to myself, what is going on here?  Why are these women allowing a social media site to make them feel so badly about what type of parent they are?  Who cares what your stupid cupcakes look like?  At least you made an effort to make them, you could have done what I've done countless times and walked into the grocery store, bought cupcakes and called it a day!

I read several articles/posts, but here are a few with opposing viewpoints that stuck out: 


So tell me Pin or Pass readers, does Pinterest make you feel bad?  Does it give you anxiety about all the pins you want to do but can't find time for? Do you feel bad when your pins come out looking crappy? Or do you take Pinterest for it is and do what you can and want with it?   Where do you fall in the Pin or Pass on Pinterest debate?  

Pin It

Monday, January 28, 2013

Pinterest Product Review - Vinyl Hello Sign

Pinterest isn't just for project ideas!  I've found some great products for sale on Pinterest too as many companies are now using Pinterest to advertise their items.  While I like to make a lot of things, there are just certain items that are out of my abilities so that's when I get out my credit card.  I have a "For Sale" board especially for these items.    

I first saw it this at an Etsy store called Ginger Snaps.  It's a vinyl sign for your front door that says 'hello."  I thought it was so cute!  What a great way to warm up your front door and greet your guests!  

I got a little nervous when I clicked on the original link because the shop owner said she was not selling the sign anymore but had passed it on to another shop, that's when I found Create it Go.  The owner of this shop was great!  

Vinyl hello sign for a quick front door makeover
All the signs she had on her page were too big for my front door.  I contacted her and she made a special order one for me that fit perfectly.  It was only $7 and easy to apply.  Now my front door looks super cute and it's removable if I ever get sick of it!  Thanks Create it Go, this item gets a big PIN from me.

Check out her shop, she has some really great stuff and provides good customer service!

So that's my quick product review for today....up next, a fun way to hang your pictures!  

Pin It

Saturday, January 26, 2013

Pinterest Appetizer Recipe - Hot Corn Dip - Guest Post

Everyone who knows me knows that cooking is not my favorite past time.  I have been turning to Pinterest lately for some new recipes and you'll see those reviews soon.  In the meantime, my friend Shauna told me she tries a new Pinterest recipe once a week so she offered to do a guest post on one of her recent favorites.  If you are getting together with friends tonight and need a quick dip recipe, this is the perfect post for you!

Here's what Shauna had to say about the Hot Corn Dip Recipe she found on Pinterest: 

Tonight we were looking for something different. Feeling snacky, I headed over to Pinterest this afternoon to find a new recipe. We are a traditional buffalo chicken dip type of family, so a new recipe was much needed. I had found a few pins for this dip so it was worth a try.

I also need to make a blatant plug for the Cozi app on my smartphone. I took a look at the ingredients from the link, excluded the things I already have and added them to my Cozi app Grocery list with tonight's date. Sent my husband to the store where he accessed the App from his phone and he was able to do the shopping for the dip and cross off the list as he went through the store.

I already had the chipotle chiles in adobo sauce, but they can be difficult to find in the store. I used them last week for a chicken enchilada soup recipe. Both those and the green chiles can be found near the mexican or taco section of a store. My only other substitutions were that hubby couldn't find only shredded monterey cheese, we used a combo shredded colby and monterey. Additionally, I only have light mayo so used that.

Hot Corn Dip Ingredients


The most interesting ingredient here were the chipotle chiles. The look funny and cut up funnier. I was concerned about chopping them up and getting them on my hands, so I used a fork and knife. They were a mess.

Hot Corn Dip Ingredients

I threw all of the ingredients right in my Corningware casserole dish and mixed it all together in there. I was concerned about the dryness of it all. Maybe more mayo? Make sure you mix it together well. I went with leaving the recipe as is to make sure it was just like it should be. The reviews were great on the original link, so I trusted the recipe. It took me about 10 minutes to put everything together. In the amount of time that the oven was preheating, I was able to measure and mix it all. While it was in the oven, I chopped the green onions, cilantro and tomato. I had a medium tomato and this time of year, it wasn't ripe. I didn't want to change the recipe too much, so I used about a quarter of the tomato to make sure I didn't leave it out.

Hot Corn Dip Ingredients


I checked the dip at 20 minutes in the oven as the recipe listed. Didn't seem warm enough so it went in for another 5 minutes. Feels like it needed the extra time. Topped it with the fresh ingredients and it looked good!

Hot Corn Dip - Finished Product

I served the dip with tortilla chips, but I think it would be better with corn chips. Both my husband and I agreed that it 100% deserves a PIN and I plan on making it for the next get together with friends. It was a winner and the fresh ingredients helped make the recipe. I wouldn't change a thing about it. I have Pinterest separated into Recipes to try and ones that I have tried and are great. Moving this over today to make again!

 - Shauna B.

Thanks Shauna, it looks great ;-)

Up next...a fun way to hang your pictures!

Pin It

Saturday, January 19, 2013

DIY - Jumbo Ruler Growth Chart


http://www.dearlillie.com/product/oversized-ruler-growth-chart
Original Pin from
Emily A. Clark
Many families have a spot in their house where they chart their kid's growth on the wall.  I've seen it done in the garage, by doors and in archways.  The only problem is, if you move, all those measurements stay with the house.  So when I came across the idea for a movable growth chart you could take with you, I had to do it!

This idea has made an appearance in multiple posts on Pinterest.  I've seen it come to life in several ways but the one I liked best came from Emily A. Clark.  I call it the jumbo ruler growth chart!  I really liked the way the original pinner's looked so in planning to create mine, I planned not to change much.

I asked my husband to get me a 2 x 6 which cost $5 at our local lumber store.  From there, he gave it a light standing and stained it using stain we had on hand from a previous project.  I bought a package of reusable number stencils from the craft store for $5.  I used a plain old black Sharpie to draw the lines and stencil the numbers.
I used a small ruler and measured out the lines using a pencil to mark the spots.  Then I went back over them with the Sharpie.  Lastly, I taped the number stencils down and colored them in with the Sharpie.  I gave the marker a few minutes to dry before I pulled the stencil off and I was done!

One note, I did find that the Sharpie bled a little.  So, just be careful not to saturate the lines too much by going over them multiple times.  Same with the number stencils.

Here's the end result...    

Movable Growth Chart

I was really happy with the way it came out.  We hung it on an awkward wall in our kitchen that leads into our family room so it has sort of become wall art too.  For $10 I got a movable jumbo ruler growth chart that can come with our family where ever we go.  My son gets a kick out of getting measured.  I think he feels like he's getting to write on something that he shouldn't be allowed to write on.  A definite PIN!

Up next...a guest post from a friend of mine who likes to use Pinterest for it's recipes.  We'll see what Shauna B. is cooking up and whether it gets a PIN or PASS.  Pin or Pass is also on Facebook now, so please follow me there too!

Pin It

Sunday, January 13, 2013

Easy DIY Wall Art - Recycled Wood and Some Fabric

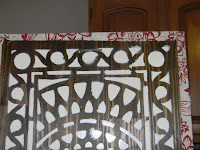
Several posts ago I shared a pin that I gave a big PASS to, called DIY wall art with your welcome mat.  If you missed that post, check it out but here's a quick reminder of the end result...yikes!

DIY wall art gone bad!
As I mentioned in the original post, I spent more than I would have liked to on the supplies for this project so when it came out terrible I started looking through my pins to see how I could recycle the supplies.  I found several pins that I got inspiration from so I incorporated pieces of each to come up with my latest project.

Home Design Pins
The New England Southerner

The original pins came from two sites, Home Design Pins and The New England Southerner.  Here are the pictures of my inspiration. I think both of these pins look great so I went out and got some fabric to cover the wood from my DIY wall art project that bombed!

For $8 from Joann Fabrics, I got enough fabric to cover both pieces of wood.  I ironed the fabric, placed the wood on it and stapled it into place.  If you've never covered anything before, it is fairly easy you just need to make sure that you don't have any bumps in the fabric and then wrap what ever you are covering similar to a present!  That may not be the "right" way to do it, but that's how I do and it works just fine, LOL!


Here's how it came out.  At first I debated about whether or not to add photos so I hung up the covered pieces without photos and lived with it for a few days.  You can see what I decided and I have to say, I love it!

DIY Wallart DIY Wallart


DIY Wallart

So for $8 I revived my dead project, recycled some materials and created something I really like.  It was quick and easy and gave me a great place to highlight my kids' pictures.  I think putting the photos on the fabric really helps them pop and stand out as a focal point of the room.  Both of these original pins get a big PIN from me!

Now, last but not least...should I put lights over them like Home Design Pins did?  Tell me what you think!

Up next...a jumbo ruler growth chart!

Pin It

Tuesday, January 8, 2013

A Home For Your Child's Artwork

Look What I Made Board
Original Idea From: Windmill Lettering
As a Mom, I love when my 3 year old comes home from Pre-K with his latest work of art! He's usually so proud of what he's done and can't wait to share it with me. For a while, the side of our fridge was his art gallery but as more and more projects came rolling in, we were quickly running out of room, until I found this!

I loved this idea so I went to JoAnn Fabrics and bought a piece of thin wood that was about $5.  Then I went to Walmart and bought a pack of wood letters. They were $10 but it came with 100 letters.  The letters on the board from Windmill Lettering are vinyl.  They look really nice but I was able to recreate a similar look for the same price AND have wood letters left over to use on future projects.

I gave my board a light sanding and spray painted it with black spray paint.  Then I spray painted the letters cream.  With a hot glue gun, I glued on each of the letters and the clothes pins and wa-la!

I decided not to put my son's name on it because I have two kids and wanted to be able to use it for both of them.  You could do the same or just make a board for each child.  I also made my board a little larger than the original pinner's.

Look What I Made display for children's art projects
My Finished Product
I spent $2 less than what it would cost to order this from the original site and I think it looks just as good, plus I have wood letters to use on upcoming projects.  So for a total of $15 I have a home for all our artwork and this project gets a definite PIN from me.       

Up next...my new wall art made from the wood of my DIY Wall Art project that bombed!


Pin It

Wednesday, January 2, 2013

A Quick Fix For Your Moving Throw Rug

I have been loosing an ongoing battle with the rug in my downstairs bathroom for quite some time.  Sitting on the laminate floor, it slides every where!  I tried the mat that went underneath but it would still shift and then you could see the mat, so the mat went in the garbage.  Then I tried the things you stick to the back and those helped but they came off after a few washes.

So, for the past few months it's been sitting, a fall waiting to happen as my 3 year old runs at warp speed to get to the potty, with nothing to stop it from sliding.  Most days it ends up bunched against the wall.  It looks messy and like I said, it's an accident waiting to happen.  

Sliding area rug


So when I found this pin project I was excited to give it a try and I'm happy to report, I think I'll be saying good-bye to moving throw rugs from now on with this simple fix!  Originally found at This Crazy Life, the author took caulk and applied it to the back of the rug.  She suggested putting the stripes every 6 inches but I did mine much closer together.  My rug was smaller than the one she was working on and I really wanted to make sure it wasn't going anywhere!  After applying all the stripes, I let it dry overnight just to be safe.  

Using caulk to stop an area rug from slidingCaulk on the back of an area rug to prevent it from sliding

The next day I put it out and the end result...a rug that stays where I put it! Victory!  This project took about 5 minutes to complete and was free for me because we had caulk and a caulk gun.  If you had to buy the supplies, it would still be relatively in-expensive.  One thing to note, the smell of the caulk was a little unpleasant for a few days.  If you try this and it smells, not to worry, after about 3 days the smell went away and now there is no odor.  This pin gets a huge PIN from me! 

Up next...Look What I Made, a pin project to display all your child's artwork.   

Pin It