 |
| DIY wall art gone bad! |
 |
| Home Design Pins |
 |
| The New England Southerner |
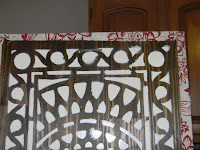
The original pins came from two sites, Home Design Pins and The New England Southerner. Here are the pictures of my inspiration. I think both of these pins look great so I went out and got some fabric to cover the wood from my DIY wall art project that bombed!
For $8 from Joann Fabrics, I got enough fabric to cover both pieces of wood. I ironed the fabric, placed the wood on it and stapled it into place. If you've never covered anything before, it is fairly easy you just need to make sure that you don't have any bumps in the fabric and then wrap what ever you are covering similar to a present! That may not be the "right" way to do it, but that's how I do and it works just fine, LOL!
Here's how it came out. At first I debated about whether or not to add photos so I hung up the covered pieces without photos and lived with it for a few days. You can see what I decided and I have to say, I love it!
So for $8 I revived my dead project, recycled some materials and created something I really like. It was quick and easy and gave me a great place to highlight my kids' pictures. I think putting the photos on the fabric really helps them pop and stand out as a focal point of the room. Both of these original pins get a big PIN from me!
Now, last but not least...should I put lights over them like Home Design Pins did? Tell me what you think!
Up next...a jumbo ruler growth chart!


Why WOULDN'T you want spotlights on your beautiful babies? :)
ReplyDeleteLOL thank you. I thought the same but I am bias ;)
ReplyDelete